
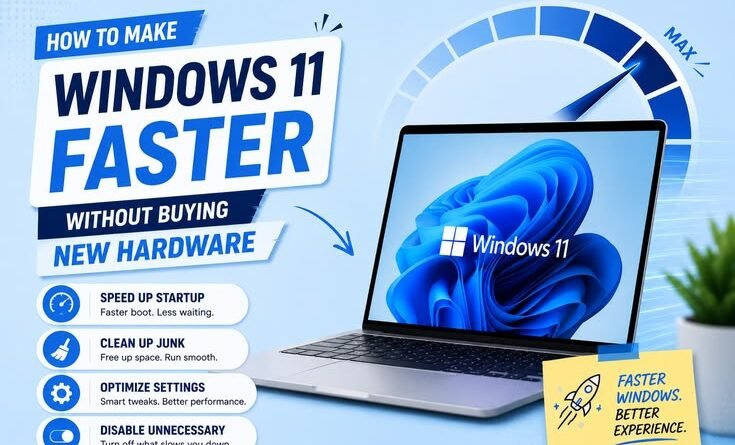
How to Make Windows 11 Faster Without Buying New Hardware
My laptop was running so slow I genuinely thought something was broken.
It was a mid-range Dell from 2020 — not a powerhouse, but not trash either. 8GB RAM, an Intel Core i5, and a 256GB SSD. Should’ve been fine for everyday work. But after upgrading to Windows 11, everything felt like it was dragging through mud. Apps took forever to open, the taskbar would freeze randomly, and switching between Chrome tabs felt like I was asking Windows for a personal favor.
I nearly talked myself into buying a new laptop. Glad I didn’t.
After about two weeks of trial and error (and a few moments of “why did that make things worse”), I figured out a handful of tweaks that genuinely transformed how my system felt. No hardware upgrades, no tech magic — just digging into settings Windows buries from you and turning off things you never asked for.
Here’s everything that worked.
First, Understand Why Windows 11 Feels Slow
Before throwing fixes at the problem, I spent an afternoon just watching Task Manager while doing normal things — opening a browser, launching Outlook, switching between apps.
What I found surprised me. My CPU was sitting at 70–80% during startup, and things I never consciously opened were chewing through RAM. Widgets, Search indexing, Teams auto-launch, Cortana running in the background — all of it adding up.
Windows 11 ships with a lot of “features” that are really background services eating your resources before you even touch anything. The goal isn’t to strip Windows down to nothing — it’s to stop it from doing things you didn’t ask it to do.
Step 1: Audit Your Startup Programs (This One Alone Made a Huge Difference)
The single biggest performance improvement I got came from here.
Press Ctrl + Shift + Esc to open Task Manager, then click the Startup apps tab. You’ll probably see a list that makes you go “when did I install that?”
On my machine, I had:
- Microsoft Teams
- Spotify
- Discord
- OneDrive
- Adobe Updater
- Two apps I didn’t even recognize
All of them loading at startup, all of them consuming memory before I’d done a single thing.
Right-click anything you don’t need the moment Windows boots, and hit Disable. You’re not uninstalling it — you’re just telling it to wait until you actually open it.
My boot time dropped from about 90 seconds to under 30 after this.
Step 2: Turn Off Visual Effects That Look Nice But Kill Performance
Windows 11 has beautiful animations. Rounded corners, shadow effects, smooth transitions — it all looks polished. It also taxes your GPU and CPU constantly.
On older or mid-range hardware, you’re essentially paying a performance tax for aesthetics you stop noticing after day two.
Here’s how to dial it back:
- Press Windows + R, type
sysdm.cpl, and hit Enter - Go to the Advanced tab, then click Settings under Performance
- Select Adjust for best performance — or if you want to keep some things, pick Custom and manually uncheck the most expensive ones (smooth-scrolling, animate windows, fade effects)
I chose Custom and kept font smoothing and thumbnail previews because those actually help usability. Everything else? Gone.
The difference was immediately noticeable. Window snapping, alt-tabbing, even just moving windows around felt crisper.
Step 3: Disable Windows 11 Widgets
I know, I know — widgets sound useful. Live weather, news, stocks. In reality, they fire up a background process called Windows Web Experience Pack that runs constantly and isn’t lightweight.
If you use widgets regularly, keep them. But if you’re like most people and your taskbar widget icon just sits there getting accidentally clicked, kill it.
Right-click the taskbar → Taskbar settings → toggle off Widgets.
You can also go further and disable the service entirely through PowerShell, but the toggle alone is enough for most people.
Step 4: Fix Your Power Plan (Most People Have This Wrong)
This one felt almost too obvious when I found it, but I’ve since mentioned it to half a dozen people who had no idea.
Windows 11 defaults many laptops and desktops to a Balanced power plan. Which sounds fine until you realize “balanced” means Windows is constantly throttling your CPU to save energy, even when you’re plugged in and actively working.
Here’s how to switch it:
- Go to Settings → System → Power & Sleep → Additional power settings (scroll down for the link)
- Select High performance
If you’re on a laptop, obviously don’t run this on battery — switch back to Balanced when unplugged. But while you’re at your desk doing actual work, there’s no reason to let Windows play it conservative.
My build times for code projects literally cut in half after this.
Step 5: Storage Sense and Disk Cleanup — Don’t Ignore This
Windows accumulates junk at a startling pace. Temp files, old Windows update installations, Recycle Bin overflow, delivery optimization files — they don’t make your CPU faster, but they can clog an SSD and cause slowdowns in file operations.
Storage Sense in Windows 11 is actually pretty decent now:
- Settings → System → Storage
- Enable Storage Sense and configure it to run automatically
- Also click Cleanup recommendations — Windows will show you how much space recoverable junk is taking up
The first time I ran this, I freed up 14GB. Some of that was old Windows update files that had been sitting around for months.
For a deeper clean, you can still run the old Disk Cleanup tool by searching it in the Start menu, then clicking Clean up system files for the full sweep.
Step 6: Check What’s Hammering Your Disk in the Background
This one took me an embarrassingly long time to find.
Open Task Manager and click the Disk column to sort by usage. If you see something called SysMain (formerly Superfetch) or Windows Search (SearchIndexer) sitting at the top during normal usage, those background processes might be your problem.
SysMain is designed to preload apps into RAM — it’s a good idea on HDDs but often counterproductive on SSDs.
To disable it:
- Press Windows + R, type
services.msc - Find SysMain, right-click → Properties
- Set Startup type to Disabled and click Stop
Same process applies to Windows Search if you don’t use the built-in search much. (Fair warning: disabling Windows Search means the Start menu search will be slower — decide based on whether you use it.)
Step 7: Adjust Your Notification and Background App Settings
This one’s subtle but adds up.
Windows 11 lets apps run in the background even when you’re not using them, refreshing data and pinging you with notifications. Every app doing this is a tiny drain — and when you’ve got 15 apps doing it simultaneously, it’s not tiny anymore.
- Settings → Apps → Installed apps
- Click any app’s three-dot menu → Advanced options
- Under Background apps permissions, set it to Never for anything that doesn’t need real-time updates
I left things like Mail, Calendar, and my VPN client alone. Everything else got switched off.
Also worth checking: Settings → System → Notifications — turn off notifications for apps that don’t need to interrupt you. This won’t speed things up dramatically, but reducing constant background wake-ups adds up over a full workday.
Step 8: Reinstall or Refresh Windows as a Last Resort (But It Works)
I resisted this for months because it sounds drastic. It’s not.
Windows 11 has a Reset this PC option that can reinstall Windows while keeping your personal files. It wipes all your apps and settings — but it also wipes every piece of software bloat, broken registry entry, and accumulated gunk that’s built up over years.
Go to Settings → System → Recovery → Reset this PC → choose Keep my files.
I did this on a secondary machine that had become nearly unusable. Afterwards, it ran like the day it was new. Took about an hour, had to reinstall my apps, but it was worth it.
Only do this if the other steps haven’t gotten you where you need to be. But don’t be afraid of it.
Mistakes I Made Along the Way

Disabling too much at once. I went overboard early on and disabled a bunch of services that turned out to matter. Printing stopped working, some apps threw errors. If you’re disabling Windows services, do it one at a time and restart between changes so you know what caused what.
Ignoring the RAM. All of this is less effective if your system is genuinely memory-starved. Open Task Manager during normal use — if your RAM is consistently at 85–90%+, these tweaks will help a little but won’t fix the underlying bottleneck. In that case, a RAM upgrade is the cheapest hardware fix you can make.
Expecting instant miracles from single tweaks. The speed improvements here are cumulative. No single setting is going to double your performance. But doing five or six of these together? That’s where the real change happens.
What Actually Moved the Needle for Me
Being honest about what made the biggest difference:
- Startup app cleanup — biggest impact, instant result
- Turning off visual effects — noticeable, especially during multitasking
- Switching to High Performance power plan — massive for CPU-heavy tasks
- Disabling SysMain — reduced disk thrashing noticeably on my SSD
Everything else was marginal but added to the overall feel of a faster, cleaner system.
A Few Free Tools Worth Knowing About
Autoruns (by Sysinternals/Microsoft) — More powerful than Task Manager for controlling startup items. Shows you everything that runs at boot, including hidden entries. Free, and it’s made by Microsoft, so it’s legit.
CrystalDiskInfo — Check the health of your SSD or HDD. If your drive is on its way out, no software tweak is going to help. Worth knowing before you spend time on anything else.
Process Monitor — If you want to get nerdy and figure out exactly what’s eating your resources at any moment, this is the tool for it.
The honest truth is that Windows 11 is a heavier operating system than Windows 10, and Microsoft ships it with a lot turned on by default that most users don’t need. That’s not unusual for big OS releases — but it does mean the default installation isn’t optimized for the hardware most people actually have.
None of this requires technical expertise. Most of it is navigating Settings menus and making judgment calls about what you actually use. Spend an hour doing these things on a slow machine, and I’d bet you notice a difference before you’re done.
Your hardware is probably fine. Windows just needs to be told to get out of its own way.


